-
About
-
Products
- By Timber Product
- Cladding
- Decking
- Screening
- Panelling
- View all
- By Application
- Exterior Cladding / Siding
- Exterior Rain Screen
- Interior Walls & Ceilings
- Soffits
- Screening, Fins & Battens
- Windows, Doors & Joinery
- Posts & Beams
- Accessories
- Coatings
- Fixings
-
Resources
- By Resource Type
- Technical Data Sheets
- Guides & Manuals
- Technical Articles
- Profile Drawings
- View all
- How To
- How to Specify
- How to Install
- How to Maintain
- Projects
- Contact
Top Four Considerations When Detailing Timber Cladding
Protecting external timber boards from the elements comes down to careful detailing and appropriate finishes.
Here’s how to keep external timber boards looking as good as the day they were applied, with careful detailing and appropriate finishes to protect from wind, rain and sun.
Much like a human being, the longevity of timber weatherboards comes
down to how well they are looked after and their exposure to the
elements.
However, much of how quickly and completely this occurs comes down to how well the design was detailed before the build took place, as well as the level of protection and maintenance the timber receives. Preventing moisture from seeping in is one of the best ways to retain stability - and there are many ways to ensure this.
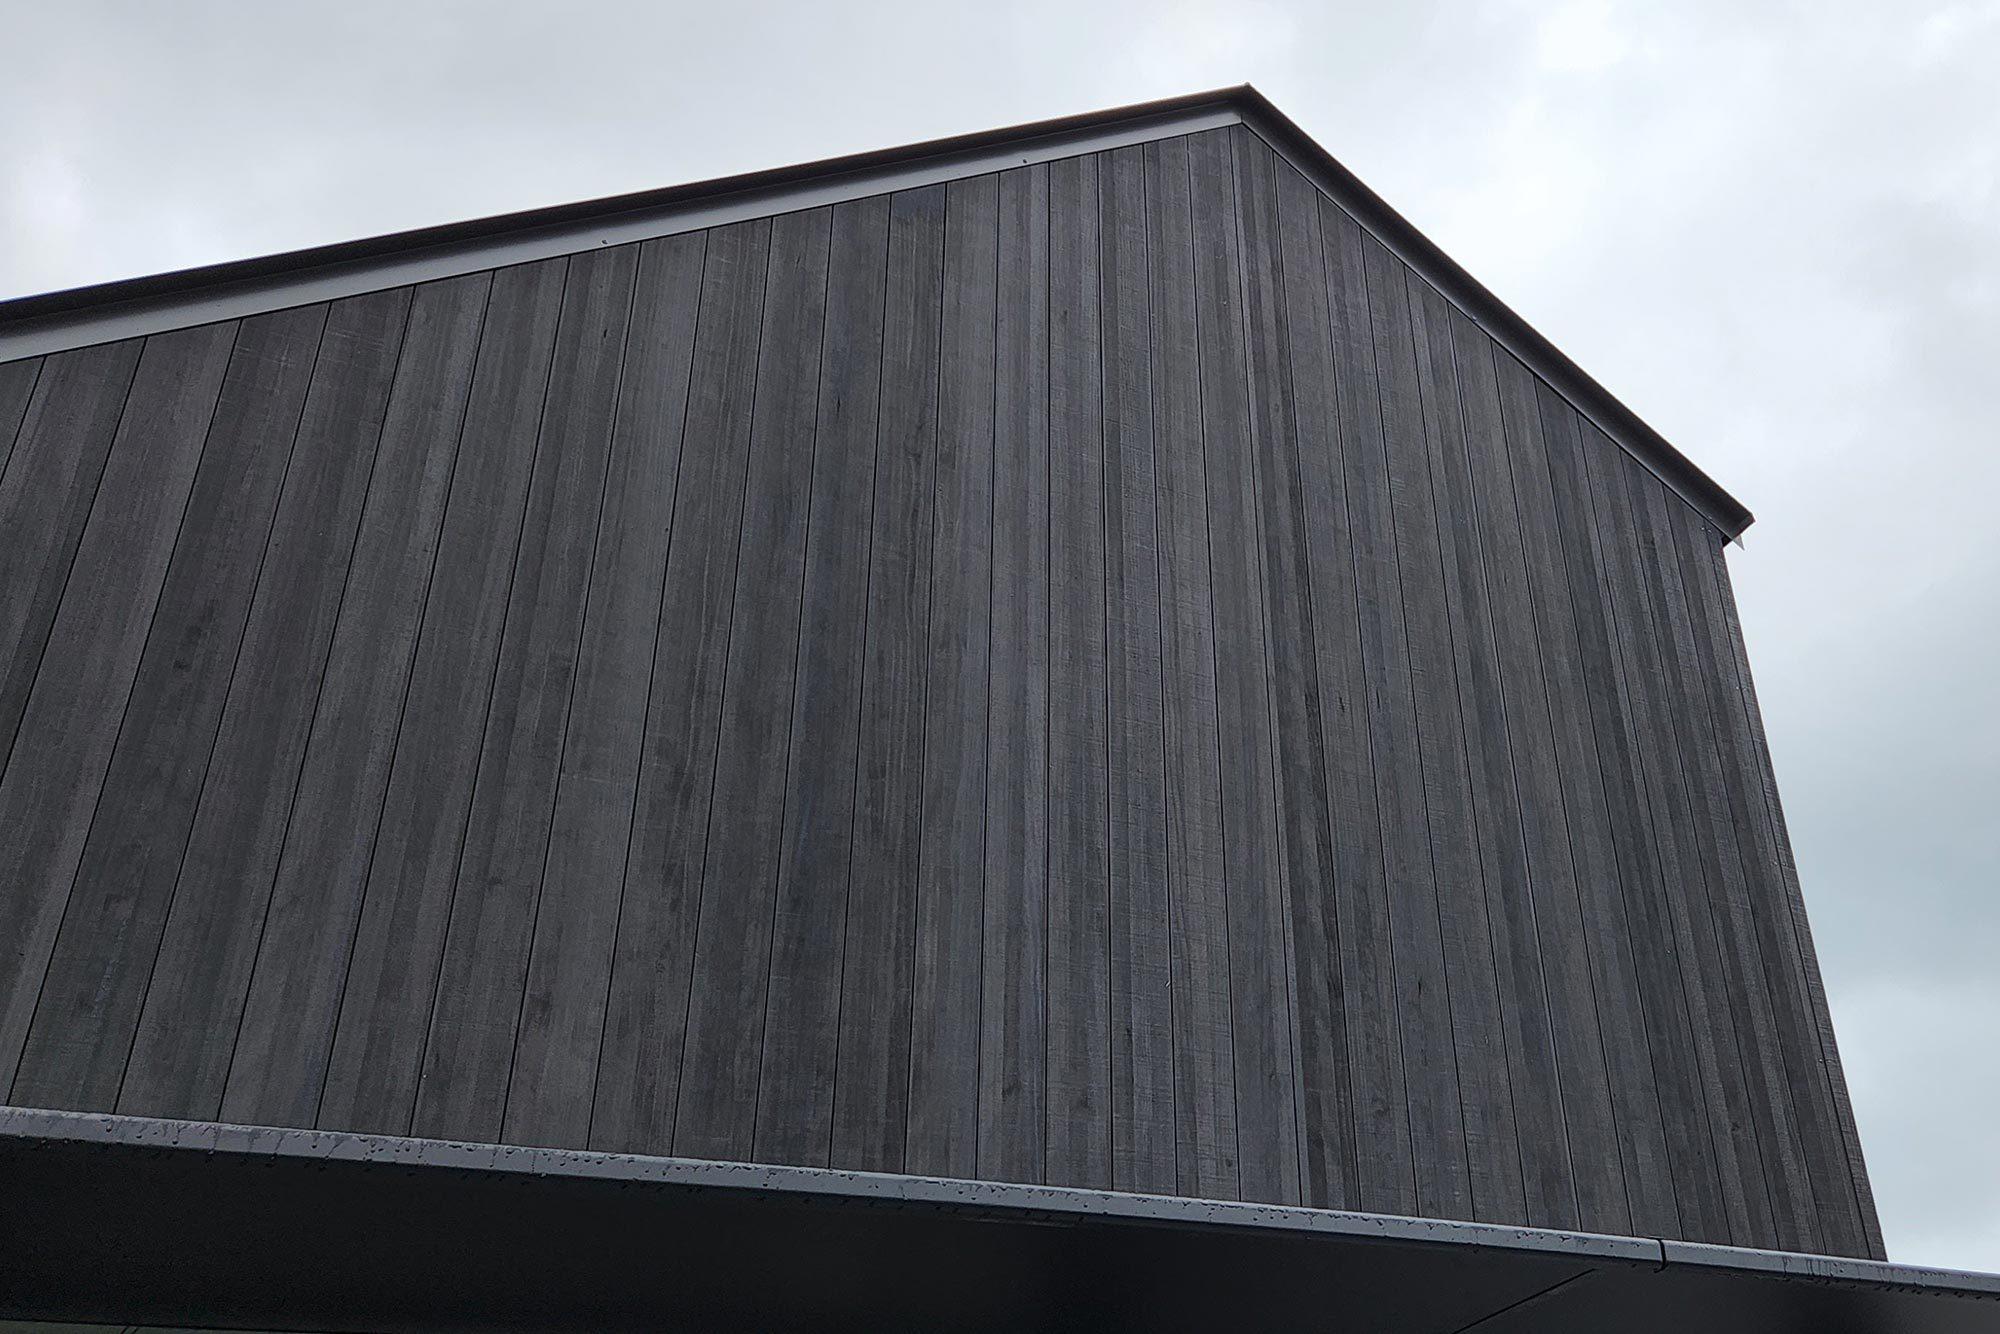
1. Give your board ends some space
The end grain of a timber board is most susceptible to moisture build up. That’s why it is common to see water damage growing from the ground up on vertical timber weatherboards. Ensuring the end of the timber doesn’t butt directly into any surface, including window heads, is the best way to prevent this. Bottom edge clearance of 5-10mm will reduce this, with a 15 degree angle to the surface below, to allow water to run off and prevent pooling.
For weatherboards close to ground level, you will need 175mm clearance from any earth and 100mm from paving to allow for significant rain events. For further protection, apply an end sealer, which will close off the end grains with a waxy layer of protection, minimising water penetration.
2. Maintenance
Maintaining your biggest asset is a must to ensure it looks great and performs for it’s lifetime. An annual wash of your house cannot be underestimated and will go a long way in keeping your beautiful timber looking great. A regular recoat of your selected coating acts as a protector to the timber. Think of it like conditioner to help prevent the timber drying out. You will find maintenance guidelines on our website.
3. Optimise your flashings.
Sufficient parapet flashings
will reduce moisture from entering from above. This protection is also
important at the bottom edge of windows, which can accumulate water that will
drip down to the weatherboards below.
Again, a slight angle is recommended to allow the moisture to fall away, and weatherboards should continue under the window edge, rather than beginning just below it, so that the timber ends are not exposed to this moisture.
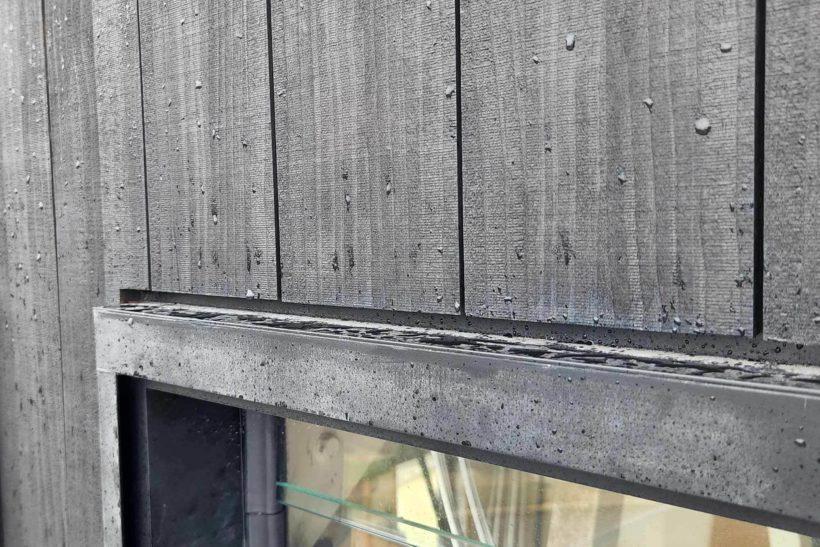
Good practice example to minimise water penetration into the end grain.
4. Specify low movement timber.
Timber will naturally
shrink and expand over time, which when applied to a building will lower its
weather tightness.
To minimise movement when water goes into and out of the timber’s cell wall, Abodo Vulcan products are put through a thermal modification process, removing water and tannins from the cell walls and then collapses the cell walls. This process prevents moisture from entering through the outer cell walls of the wood in service and stops any changes in temperature from affecting its stability.
For more information and clear, concise images of best practice detailing, visit our Resources page and download our suite of CodeMark (NZ) CAD drawings.
Good practice example of sufficient parapet flashing.